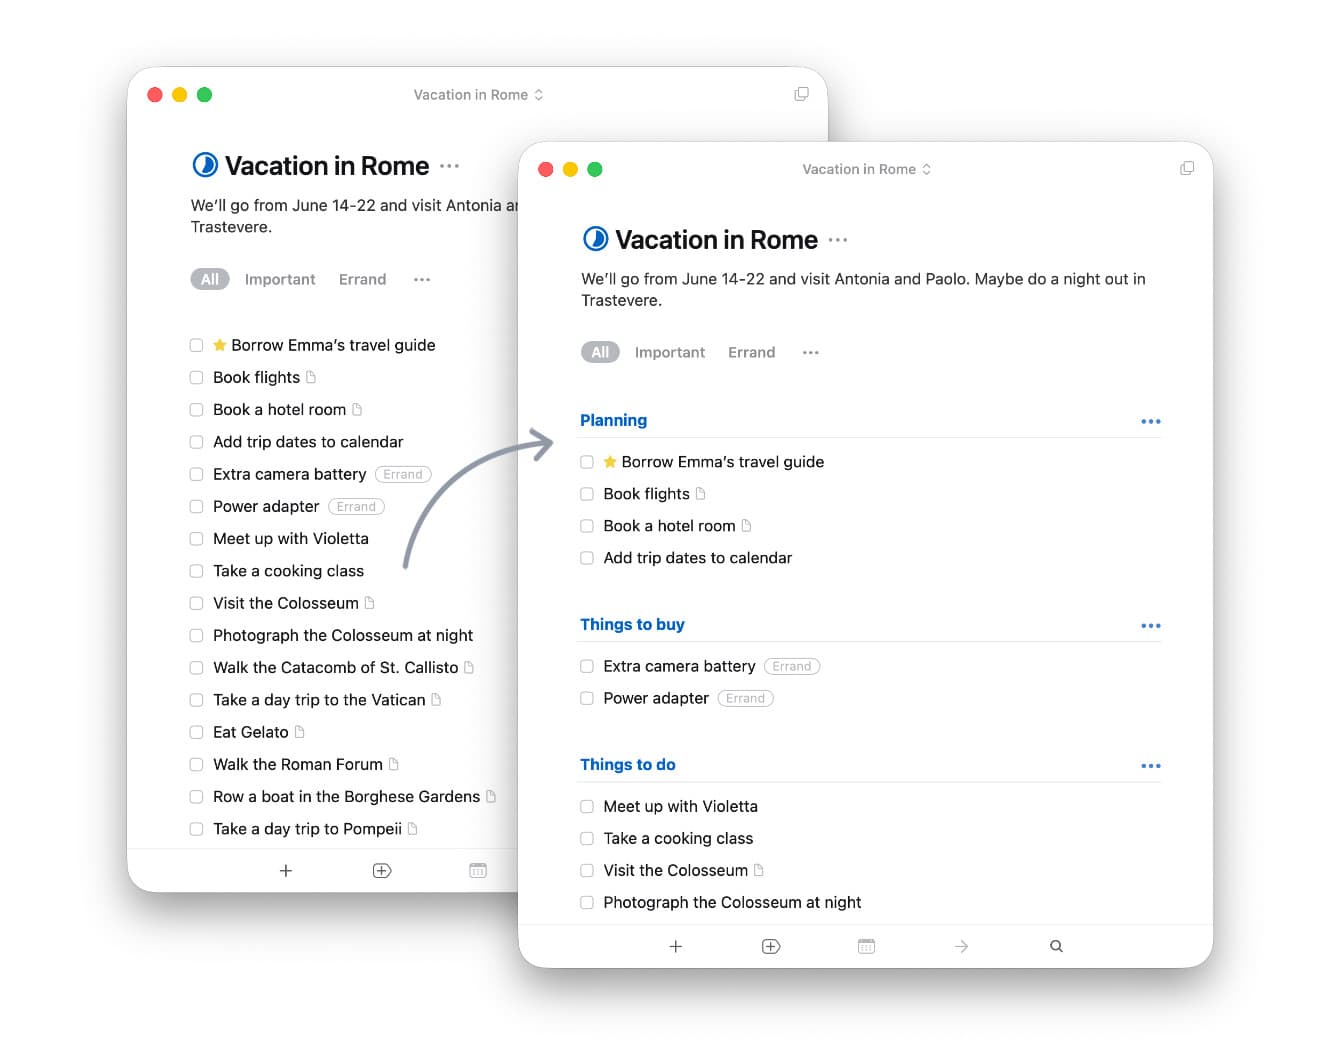
Headings help you get complex projects under control by breaking them down into smaller parts.
Sometimes a project can get quite complicated, with dozens of to-dos in one long list. With Headings, you can break that list up into smaller parts like categories or milestones.
In this article:
Create a new heading
Mac
- On your Mac, open Things.
- Enter one of your Projects.
- Press ⌘ Cmd ⇧ Shift N or go to the menu bar at the top of your screen and click File → New Heading.
💡Tip: Add a heading under existing to-dos by selecting the last one and then using the menu or keyboard shortcut.
iPad & iPhone
- On your iPad or iPhone, open Things.
- Tap one of your Projects.
- At the top of your screen, tap → New Heading.
💡Tip: Insert a new heading anywhere by dragging the along the left edge of the screen (iPhone) or between the sidebar and to-do list (iPad). A keyboard shortcut is available for iPad users with hardware keyboards.
Vision
In Things for Vision, please follow the same steps as described in the iPad & iPhone tab above.
Headings are only available in projects. This feature is not available in areas or any other list.
Group selected to-dos under a new heading
Mac
- On your Mac, open Things.
- In the sidebar, click one of your Projects.
- Select a group of to-dos that aren’t under a heading yet.
- In the menu bar at the top of your screen, click File.
- On your keyboard, hold down ⌥ Opt to reveal extra options in the menu.
- Click New Heading with Selection.
The to-dos you’ve selected will move under the new heading. You can also do this via a keyboard shortcut.
iPad
You need a hardware keyboard to use this feature with your iPad.
- On your iPad, open Things.
- In the sidebar, tap one of your Projects.
- Select a group of to-dos that aren’t under a heading yet.
- Hit ⌘ Cmd ⌥ Opt ⇧ Shift N.
Don’t have a hardware keyboard? No problem. Just create a heading first and then move selected to-dos under the heading.
iPhone
This feature is only available on Mac, iPad, Vision. But you can just create a new heading and then move selected to-dos under it.
Vision
In Things for Vision, please follow the same steps as described in the iPad tab above.
Target a heading while moving to-dos
You can file to-dos directly under headings when moving them from other lists or creating them in Quick Entry:
Mac
- On your Mac, open Things.
- Select the to-dos you want to move.
- In the menu bar at the top of your screen, click Items → Move.
- Start typing the name of a heading and select its project from the search results.
To access the Move dialog faster, press ⌘ Cmd ⇧ Shift M. This works after selecting a to-do, inside an open one, and in Quick Entry.
iPad & iPhone
- On your iPad or iPhone, open Things.
- Swipe left on a to-do to select it.
- Tap Move.
- Pull down to reveal Search.
- Start typing the name of a heading and tap its project from the search results.
This is also available in Quick Entry so you can already target headings while creating to-dos. A keyboard shortcut is available for iPad users with hardware keyboards.
Vision
In Things for Vision, please follow the same steps as described in the iPad & iPhone tab above.
💡Tip: If you have the same headings in multiple projects, or your heading isn’t found when typing it into Move, you can try a combination of the project name and heading. For example, if your project is called Travel to Faroe Islands and your heading is Preparation, you could type “far prep” to help Things find it.
Move a heading
When you move a heading, any to-dos under it will be moved as well. There are several ways to move a heading:
Mac
- Drag it to another place in the list.
- Drag it to a project in another window.
- Next to the heading, click → Move.
iPad & iPhone
- Tap and hold the heading and drag it to another place in the list.
- Next to the heading, tap → Move to move it to another project.
On an iPad, you can also open two Things windows side-by-side and drag a heading from one project to another.
Vision
In Things for Vision, please follow the same steps as described in the iPad & iPhone tab above.
Duplicate a heading
When you need the same set of to-dos again, you can duplicate the heading and all to-dos belonging to it. Here’s how to do that:
Mac
- Select a heading and hit ⌘ Cmd D.
- Right-click on a heading and select Duplicate heading.
You can also select a heading and hit ⌘ Cmd C to copy it. You can paste it and all of its to-dos back into the same project via ⌘ Cmd V, add it to another project, or even paste it as a plain text list into another app.
iPad
- Next to the heading, tap → Duplicate.
- Right-click on a heading and select Duplicate.
If you’re using a hardware keyboard with your iPad, you can also select a heading and hit ⌘ Cmd C to copy it. You can paste it and all of its to-dos back into the same project via ⌘ Cmd V, or add it to another project.
iPhone
- Next to the heading, tap → Duplicate.
Vision
In Things for Vision, please follow the same steps as described in the iPad tab above.
Convert a heading to a project
When a part of a project turns out to be more involved, you can promote a heading and its to-dos to a separate project. Here’s how:
Mac
- Next to the heading, click → Convert to Project...
- Select a heading. In the menu bar at the top of your screen click Items → Convert to Project.
- Right-click on a heading and select Convert to Project.
iPad
- Next to the heading, tap → Convert.
- Right-click on a heading and select Convert.
iPhone
- Next to the heading, tap → Convert.
Vision
In Things for Vision, please follow the same steps as described in the iPad tab above.
Archive a heading when you’re done
If you’ve completed all the to-dos under a heading and you don’t need it anymore, you can archive it to keep your list tidy.
Mac
Next to the heading, click → Archive. The heading will move to the logged items at the bottom of the project for future reference.
iPad & iPhone
Next to the heading, tap → Archive. The heading will move to the logged items at the bottom of the project for future reference.
Vision
In Things for Vision, please follow the same steps as described in the iPad & iPhone tab above.